Here I give you the first of what will likely be many more DIYs I will post to this blog. This is the first Halloween I've had living in my own place that I actually want to decorate. I was living in student housing before (nothing like a room with thin plaster walls and checkered tiles?), and since moving into my new place almost a full year ago, I never really got a chance to even think about decorating for holidays. Mostly just unpacking boxes and assembling furniture. Which I am still doing. It's a little pathetic.
So I bring to you today an easy, wallet-friendly Halloween DIY that you can make with supplies you likely already have lying around the house!
Here's what you'll need:
1. Paper towel/toilet paper rolls of various sizes.
2. Scissors
3. A glue gun
4. A buttload of glue gun sticks
5. Duct tape. Any colour is fine since you won't be seeing it.
6. Paint of some sort, preferably non-toxic. Though I used Liquitex black gesso, which is non-toxic as according to this.
7. Brushes. One is fine, but you can also use various sizes/shapes if you'd like.
8. Tea lights. Scented/unscented, coloured/white, real or fake. The choice is yours!
9. A pen
10. Lots and lots of time. I suggest a TV show marathon! (I recommend American Horror Story in keeping with the Halloween theme)
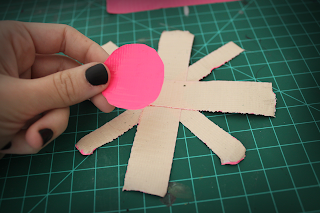
STEP 3: Take one tea light, and use it to trace a circle on your duct tape square. Cut this out, don't worry about it being perfect... cutting duct tape can be annoying. You'll also want to cut both your duct tape strips in half lengthwise. Take only ONE of those halves and cut it lengthwise again so you get two really narrow strips.
STEP 6: Now it's time for the fun/tedious part! The gluing! Take your glue gun and start your gluing by lining the top of the roll. This will help as a guide for where to start your glue/fake wax globs. You don't want to go too far over into the roll or else it'll be very hard to take your candle out! Make lines from that first line to however far down you'd like. Make big and little globs with the glue! Make long and short lines! If you're lost on how much glue to add try to think of how much wax would have melted down had the candle been real and originally tall. Have fun with it and don't burn yourself.
Please don't burn yourself.
My candle is pretty small and stubby, so I added a ton of glue to make it look like it had been burning a while!
STEP 7: Once all the glue has dried, PAINT. I chose black gesso, because it dries matte like a candle would be and I thought black would look creepy for Halloween. But you can do any colour. Red, white, pink, orange... whatever. Do as many coats as you feel necessary. I'd also suggest priming your piece beforehand with a primer or gesso if you're not painting with gesso only. It'll help in decreasing the layers of paint you'll have to do with your chosen colour!
STEP 8: Add your tea lights and arrange them around wherever you want to display them! I bought mine from IKEA. They're red and smell like berries, because why not. You can also buy real and fake tea lights at most dollar stores, IKEA, and Target/Walmart sort of places. They come in different colours and scents, so get creative with matching them to your candle holders! Pink candles in a white holder? Green lights in an orange holder to look like a pumpkin? Go for it! They're inexpensive and come in MASSIVE packs. Change them out whenever you feel like it!
Personally, I'm very happy with how mine turned out. It's a fun way to re-use paper rolls, and they can be reused every year since they never burn down!
|
|
Let me know what you think of my first DIY tutorial, and if you try it out I'd love to see photos of your final products! Send me links to the pictures, or hashtag on twitter/instagram with #hauteteawithhoney. Maybe I'll post some of my favourites in the future?
I know it's last minute... but hey. I made all these in a day. You could totally do this as last minute decorations for your Halloween party. Or make them for next year!
Stay sweet.
x,
Mickie


Wow thats amazing! Well done!
ReplyDeleteSO creative and cool!! LOVE IT!
ReplyDeleteThey look so cool!
ReplyDeletewow that's fantastic! You're so creative and I really love how they turned out. I don't really do much/any DIY. I'd like to claim I don't have time, but really I have 85 billion other hobbies instead. I used to do collaging and making my own envelopes and things like that but I had to get rid of most of my supplies because of moving and I haven't bothered to build back up again. This is super easy in terms of the supplies you need though, and the end result is stunning!
ReplyDeletewritingwhimsy.com
Great Content. I have appreciated with getting lot of good quality candles information with your post.......
ReplyDeleteThanks for sharing such kind of nice candles. I love reading your posts regularly. They make me happy. Get Wholesale Unscented Pillar Candles .